12.03.2009

Pink Cupcakes


Love this stamp set (Crazy For Cupcakes). I tend to use these colors (Regal Rose, Pink Pirouette and Sweet Always DSP - this was my LAST scrap of Sweet Always, loved that paper!) alot with this stamp and you've seen this combo before. This time I did that sort of new and trendy thing with the ribbon and added some doodling and a button with some bling to the image panel.


Happy Stamping!


GigiPosted by Picasa

12.01.2009

Happy Holidays


Well I have to say that I am so happy these aren't real snowmen! Its the end of November and we've had barely a skiff of know. I am so thankful for this glorious weather!


This card is totally CASED from a card I did about 5 years ago in Karrie's marker club. I switched out Flaky Friends and used the snowmen from the Level 3 set The More the Merrier. I made the card a 4-1/4" square layering Brocade Blue and Basic Black. Once again used a Texturz plate (SU Backgrounds 1). Sentiment is from Four The Holidays.


Love these little guys - they are so cute!


Happy Stamping!


Gigi


Posted by Picasa

11.28.2009

Peace on Earth CASE

Totally cased this card from someone someplace in the cyber world. Sorry I don't remember who or where, but suffice it to say, that I totally copied this one.

A Rich Razzleberry 6x3 base with a layer of Old Olive. The snowflake is from Patterned Pines (Level 1 Hostess in the mini) and is stamped in Bermuda Bay, Old Olive and Rich Razzleberry. The sentiment (Four The Holidays) is stamped with Bermuda Bay. The ribbon is retired Old Olive twill. I added tiny rhinestones to the centre of each flake with Tombow Multi Purpose Adhesive.

I really like these colors together - not sure if I would've thought to put them together on my own!

Happy Stamping!

Gigi
Posted by Picasa

11.11.2009

Club Project

This little project is one my club girls will be doing this week. I am loving this little wall hanging. If you are a demo you may recognize it from our October SS.

I cut the bases out of On Board Book Basics chipboard with the Bigz Clear Scallop Square Die. I then used the same die to do the Chocolate Chip. Then added a layer of Old Olive that had been run throught my BigShot with a Texturz plate. The letters (Serif Essentials Alpha) were also done with On Board chipboard along with Real Red cardstock.

I added the snowflake and the holly (stamped on a scrap of Whisper White and cut out, stamp is from Christmas Classics) and a few tiny rhinestones for a hit of bling!

I used Tombow Multi Purpose Adhesive to stick the whole thing together.


Happy Stamping!

Gigi
Posted by Picasa

10.18.2009

Mini Christmas Album

This is a little mini album made with the I Wish (retired) Simply Scrappin Kit. I have bits and pieces of this kit leftover from last year and this little project put them to great use!

I found the tutorial on Corinne Summerville's blog. This woman has lots of enthusiasm for stamping and she is pretty excited sharing this project! Be prepared for her "knock your socks off" tutorial.

I added the belly band (I LOVE belly bands) but other than that I just followed the simple instructions.

This little album would make a cute (and quick) gift for many occasions.

Enjoy!

Gigi


10.16.2009

Downline Meeting

My upline is having a downline meeting this Friday. I am looking forward to it as I had to miss the last one and its always a fun evening of creating, gabbing and munching!

I am in charge of creating a make 'n take. I came up with this gift card holder. I am still not 100% sure this will be my final project. If you know me at all then you know I work best under pressure and will probably get inspired after work on Friday and whip something entirely different up for the meeting at 7pm!

This is a 4-1/4" by 11" piece of Brocade Blue cardstock that has been scored at 3-1/4", 5" and 7-3/4". The centre score is a mountain fold and the two end scores become valleys. The centre portion is adhered on its backside with sticky strip (but NOT on the fold side). On the fold side of the centre portion, I used my word window punch about 1/2" in from both the top and bottom and then my 1-1/4" circle punch in the centre of the punched word window. Make sense? This creates the pocket for the gift card.


The front started with a piece of Brocade ribbon then was layered with Very Vanilla and Bashful Blue. The blue was run through my Big Shot with the Perfect Details Texturz plate. This image from Tree Trimings was first stamped in Brocade Blue on a piece of Very Vanilla which was then layered on Brocade Blue. The ornament was again inked up in Brocade and I used a sponge dauber to apply some Champagne Mist Shimmer Paint to the rubber (yes, right on top of the ink). This image was then cut out and adhered with dimensionals.

This is one of my favorite ways to package a gift card.

Happy Stamping!

Gigi

10.14.2009

Happy Thanksgiving (a few days late!)

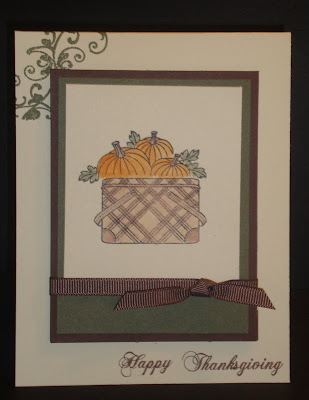
Thanksgiving was a few days ago and I hope you all enjoyed the long weekend and ate a bite or two! I know did!

My boss had asked for a few samples of Thanksgiving cards that I could then produce and send to clients. I came through with the samples but forgot he was out of town the 1st week of October. Thus there was no time for final approval and most importantly, the production of 60+ cards!

These are the samples I came up with. Neither uses SU stamps.

I wanted to keep the design simple to ease the production.

The first card is Very Vanilla, Chocolate Chip, Always Artichoke, Pumpkin Pie and Close to Cocoa. The image was colored with ink and a blender pen.


The second card is Very Vanilla, Pumpklin Pie, Old Olive, Chocolate Chip and Close to Cocoa. If this card looks familiar you may be thinking of
this card. Same layout, different card.


Well, now he's asked for Christmas cards, so I'd better make sure I get samples done and the design approved before he takes off again!

Happy Stamping!

Gigi

9.23.2009

My baby's birthday!

Its Connor's 10th birthday today! No he isn't a baby, but I could swear it wasn't that long ago that I was holding him in my arms. I think I blinked!


Here is his card. A layout I've used before (that I cased from Karrie). I love this Texturz plate (Perfect Details). I used the star from Nursery Necessities and the sentiment is from On Your Birthday. Colors are Pumpkin Pie, Very Vanilla and of course, Chocolate Chip. I finished it off with a few Pumpkin Pie brads. I don't use colored brads very often but they suited this card well.

He is such a sweetheart and I really don't know where the time has gone!

Happy stamping!

Gigi

9.16.2009

More MDS


I am loving it!

Today's page was made from scratch. This means I started with a white page with a photo layout and added each detail separately. This took me about an hour.

Here's how I did it:


  • choose the background color (Baja Blue)


  • added the Chocolate piece behind the photos

  • dropped the photos

  • added punches circles - here I added one then resized and colored it then copied and pasted, then I added two more each time repeating the sizing and coloring process

  • added the 'torn edge' stamp - this is the blue swirly at the bottom - it is a stamp that I stamped then colored and sized

  • added the text boxes, formatted the text to the type, color and size I wanted


  • added the brackets (love those)

  • the final detail was to add the white stitching on the Chocolate Chip piece

Too fun! Hope you enjoy!

Gigi

9.14.2009

Its here!

My Digital Studio that is! This is so much fun! I used the Summer Home kit. I added the text box (that you can't really see in the photo, its under the photo on the first page) and photos and moved some of the embellishments around a bit, but really just used the layout the way it was. This is so easy and fun!!


I am sure I'll have more to share with you soon!


Although these pages were easy to create it was much more difficult trying to get them side by side on my blog! Sorry, I just couldn't figure it out! My Digital Studio is much easier than blogger!!!


Gigi


Season of Friendship


Today I am revealing the Season of Friendship class project. The class is a boxed set of these 4 cards. (I will show you the box later. )

I love the jewel tones of these cards. My initial plan was to avoid representing the 4 season, (since its been done many times by many stampers, myself included) but in the end these colors called to me and they each "felt" like Spring, Summer, Winter and Fall.


The Flourish Texturz plate is used on each card as well as a sentiment from Teeny Tiny Wishes.

This class is being held October 24 at 1PM. I hope you can join us!


Happy Stamping

Gigi


9.13.2009

Scrapping with the Mini


I made these Christmas scrapbook pages with DSP from the new mini and the Merry Details Sizzlet. My base is 12x12 Textured Real Red. The base squares are Kraft layered with Soft Suede. Then I randomly placed either a photo from a Christmas past or a piece of Christmas Cocoa DSP (okay it wasn't so random, I spent some time moving the squares around until I was pleased with the final look). The giant snowflake pieces are flocked! They are so pretty! I added a couple of the birds cut with the Merry Details Sizzlet. Its a great little Sizzlet that adds a touch of - for lack of a better word - detail to projects. The letters were cut using my Timesless Type Sizzlets.

Happy Stamping (and scrapping)!

Gigi
Posted by Picasa

9.07.2009

Charming

Charming is a stamp set from the new SU mini. It is the set that corresponds to the new charm jewelery; I haven't ordered the charms (not really my thing) but I really like the stamp set!

This card is a Very Vanilla base topped with a layer of Rich Razzleberry. I then ran a piece of Chocolate Chip through the Big Shot with the Perfect Details Texturz plate. This Chocolate piece and a piece of Old Olive top the Razzleberry.

The image is actually 3 of the stamps from the set. I first stamped the background in Chocolate Chip. Next I used my Old Olive and Rich Razzleberry markers directly on the rubber on the stem and flower image. Finally, I added that little butterfly. I suppose a sentiment could be added to the top right of the card, but I kind of like the simplicity of it (and it can be used for any occasion!).

And of course a piece of my favorite ribbon, 5/8" grosgrain, finishes off the card.
Happy Stamping!
Gigi
Edited to add: Forgot to mention that this layout and color combo was totally cased from a card I saw online. Sorry I can't recall whose blog it was!
Posted by Picasa

9.05.2009

Holiday Mini

You'll find the inspiration for this card on page 26 of the new SU Holiday Mini. I used the new SU Sizzlet Merry Details to cut my snowflakes.

I then dabbed Champagne Mist Shimmer Paint on each snowflake. I really wasn't sure why I ordered the Shimmer paint as I paint about as well I sew! But I really like the nice bit of sparkle it added to this card. I have included a close up photo of one these flakes, its not the best pic, but you get the idea.

The sentiment is also from the mini: Four the Holidays, a nice set of 4 stamps each being a holiday sentiment.

The colors used are Kraft, Bordering Blue and Very Vanilla.


Happy Stamping!

Gigi

PS. Also in this mini is My Digital Studio - SU's very own digital project software. Mine is on its way to me (customers can begin ordering it October 1)!!! Woohoo, I have already seen a few samples of My Digital Studio projects and I am so pumped to try it!


9.01.2009

Someone's expecting!

And, no its not me! Wouldn't bother me, but not likely to happen! Anyway, someone very dear to me is expecting. I won't say who since its her news to share, but we are very excited for the expected arrival (February 2010).

This image and sentiment are from My Favorite Things. I used blender pens and classic inks to color it. Cardstock is So Saffron, Chocolate Chip, Brocade Blue and Whisper White.

I added the scalloped piece at the very end. It just looked bare at the top. I thought about using dew drops but they didn`t quite look right. I am not sure this scallop looks quite right either, but I am not changing it.

That's all for today. Sorry I have been delinquent; lots of excuses I won't bother sharing, but hopefully I am back in the groove now and can get back to posting a few times a week.

Happy Stamping!

Gigi
Posted by Picasa

8.16.2009

An afternoon in Italy

We celebrated at an engagement party this afternoon. My niece is engaged to a nice Italian boy and we had homemade pizzas, delish cannolis and a few shots of Sambuca! Sambuca on a Sunday.....not my usual afternoon but lots of fun!

This is the card I made for the happy couple. A bit of a departure from my normal style but I really wanted to use the new Hearts and Brackets die. The cardstock is Soft Sky, River Rock and Chocolate Chip. The DSP is from the (retired) Rose Cottage SSK. I used my new Eyelet Border punch (can you believe I just got it?).

The Hearts and brackets is a Bigz die so I was able to cut the shapes in chipboard then cardstock (you can't tell from the photo but they are Soft Sky). I adhered the cardstock to the chipboard with Tombow Multi Glue. I used my computer to print "Live, Laugh, Love" on the heart.

I am not sure I love the end result. It appeals to me in some ways, but not others. Whatever, this is the end result and I know my niece appreciates receiving a card made especially for her (and her guy).

Happy stamping!

Gigi
Posted by Picasa

8.15.2009

That little monkey

Another Changito card. He makes me happy.

This card uses Kraft and Kiwi Kiss cardstock with some DSP and a piece of sticker edge from the (retired) Best Ever SSK. I once again watercolored the image, cut it out and popped it up on dimensionals.

I added the punched stars and brads to finish it off.

Now that I am paying attention, it is apparent this is another card WITHOUT RIBBON! Seriously I am in a whole new zone.

Happy stamping!

Gigi
Posted by Picasa

8.14.2009

Out of my little box

The SoShelli Creative Challenge this month is to create a project using only paper, ink and stamps. This is a serious challenge. Really, have you created much lately without brads, pretties, hodgepodge, punches (maybe those would be okay, but I stuck to the absolute basics) and oh my, this one made me hyperventilate, a card with NO RIBBON! None. Not one little scrap.

The challenge "rules" weren't really detailed but we could use cutting tools so for me this meant I could use my scoring blade in my paper trimmer.

I ended up with a Perfect Plum and Pale Plum monochromatic card. I scored the top layer (are you tired of those yet? I'm not, you'll be seeing more I'm sure!). The flower is from Greenhouse Garden, a new set in this IBC. I used Pale Plum, Perfect Plum and Always Artichoke classic ink. The sentiment is from Oval All - I simply masked off the "frame" with masking tape. Super simple way to get only the image you want from a stamp.


Happy Stamping!

Gigi
Posted by Picasa

8.07.2009

The last wedding of the season

This weekend we will be attending a wedding reception for my good friend's brother. The actual wedding took place in Italy a few weeks ago.

This card is a 5-1/8 Chocolate Chip square base layered with Very Vanilla and another Chocolate Chip piece with each layer being an 1/8' smaller than the previous layer. I once again scored a quilt pattern with my ScorPal and added tiny vanilla half back pearls at each intersection. I created a Chocolate Chip and Vanilla belly band and added a scallop circle embellishment. The sentiment is from All Holidays (actually the 'Peace, Love, Joy' stamp, I simply inked up the one word).

The inside of the card has a pocket for some cash and the same sentiment I have used on both previous wedding cards.

Congrats Anthony and Peg!

Gigi


Posted by Picasa

8.06.2009

Happy Birthday Kirsten

This week is my BFF's birthday. We have been celebrating birthdays together since the 1st grade! I had alot of trouble coming up with a card and I am still not 100% sold on this one, although of all of efforts this was the best.

This is a Very Vanilla base topped with each a Chocolate Chip and Very Vanilla layer. The image was inked up with Rose Red Classic Ink. I then removed the Rose Red from stems on rubber with a blender pen. The next step was to add the stems back by using my Chocolate Chip marker directly on the rubber. The sentiment was inked up with my Chocolate Chip marker.

I colored white half back pearls from the Pretties Kit by painting them with a mixture of Chocolate Chip re-inker and Crystal Effects. This technique is so easy, the hardest part if having the patience to let it dry completely before touching them! They add a nice little touch, but in real life they're kind of large for the scale of the card; I probably should have used the smaller ones.

Happy Stamping!

Gigi

Posted by Picasa


August 7th, 7:45 AM Edited

I changed it and I much prefer this version. Those pearls were just too big.

Cheers!

7.25.2009

Congrats Amber & Jason!

Today is my niece's wedding. Remember those wedding favours? Yes, I did get them finished with plenty of time to spare!

When the bride and groom came over to discuss their invitations, the groom saw this Stamping Bella stamp; he wanted it used on the invitations. The bride said no and I said no since I wasn't keen on watercoloring 100 of this image. So this card was made just for Jason.


I won't talk about how many times I re-stamped and colored the image. I didn't want to use watercolor paper as it is more an off white color than a pure white so I was coloring with my markers on regular cardstock which took a fair amount of effort until I was happy with the results.

I once again used my Texturz plates, added a bit of bling and some ribbon and this is the final result.

Its a beautiful day for an outdoor wedding.

PS. Sorry for the poor quality photo. I had to scan it. I broke my camera while I was on holidays {Note to self: take the camera out of the beach bag before turning it upside down and shaking the sand out of it while standing on cement}. I did buy a new camera today but the battery needs to charge for a whole day before I can use it - guess I won't be taking any photos at the wedding.

Happy Stamping!

Gigi

7.16.2009

Registration for my fall classes has already begun. Sign up today before a class fills up! I will post here when a class has become full.

Free Fall Event - Kickoff to the Season!

Sep 12
1pm - 4pmMake & Take's and prizes!! Come check out the new Holiday Mini Catalogue!
* Registration closes August 25th

Card Classes

Each card class listed here will include instructions for making a card portfolio - at each class we'll make a different type of card box!

Each class also includes a set of 4 coordinating cards - each card using a different layout (i.e. not 4 identical cards)

Oct 3
9am - noonSimple Friendship Card Set & Box
$25
Oct 249am - noonGreenhouse Garden Card Set & Box
$25
Oct 241pm - 4pmSeason of Friendship Card Set & Box
$25
Dec 51pm - 4pmParadise Card Set & Box
$25

Specialty Classes

There are the "Anything BUT a Card" classes. You'll be able to view some samples at the free event on Sep 12th.

Oct 3
1pm - 4pmMini Album
$30 or 2 albums for $50
An adorable mini album using the Sunny Day Simply Scrappin' Kit - A Fabulous Gift!
Dec 59am - noon2010 Purse Calendar
$25 or 2 calendars for $40
The annual coil-bound calendar class. Perfect for Holiday Gift-Giving!

Annual Christmas Card Class

Nov 7
9am - 4pm$60 - or register with 2 friends who have never attended before, and all 3 registrations are just $125!
Make 30 Christmas Cards - 5 each of 6 designs. Lunch, Snacks & Beverages are included.

First Ever All-Day Crop!!

Nov 28
9am - midnightCome & Go all day
$99
This come & go (or stay all day!) event is designed for you to power through your holiday gift projects - or any project, for that matter!
You will receive a goodie bag with products, and a wide range of ideas & inspiration for all your goodies.
Or, if you've got your own projects to finish, bring 'em along! With a whole day to yourself without the normal interruptions of home, imagine what you can accomplish!
Activities and prizes all day long. Lunch, supper, snacks & beverages are included.
Earlybird registration is on now - sign up today for just $75

7.15.2009

Wedding Favors

My niece asked my sister and I to make the favors for her wedding. They knew what they wanted (gum packs) but it was up to us to figure it out! We used the same cardstock we used for their invitations and made a little matchbook style cover for the gum, added a tag and voila! They are pretty simple but will look pretty all piled in a big basket and the bride is happy with them so that is all that matters.

The favors aren't ready yet. We still have to add the gum, ribbon and tag to the ones in the green bin. We ran out of the white ribbon.
The wedding is in two weeks. Think I should get on this? Good thing I work well under pressure!


Happy Stamping!


Gigi

7.13.2009

Chicken Paper Box

Isn't this a cute little gift box? I used "chicken paper" DSP. Okay you're thinking I've lost it...for some reason I can never remember the name of this DSP (which, for the record, is Good Morning Sunshine, I looked it up) and I always refer to it as The Chicken Paper. I don't know why my brain works this way.

Okay, on to the project. I used Summer Sun and Chocolate Chip cardstock along with some Chocolate Chip narrow grosgrain ribbon, a felt fusion flower and a Chocolate Chip brad. Its supposed to have a cutout window on the front panel, but that seemed like excessive effort tonight. Many thanks to Tracy Harp for posting
the tutorial on her blog.


{Okay did anyone else buy alot of Summer Sun to use with the chicken paper and now you're wondering, like me, "what the heck am I going to do with all this Summer Sun now that the chicken paper is retired?" I am so not a Summer Sun kind of girl.}


Happy Stamping!

Gigi

7.11.2009

Happy Retirement


Made this one as a retirement card. It is a Kraft base with a Chocolate Chip layer. On top of the Chocolate Chip is a piece of some designer paper - I think I got it from Karrie years ago but have no idea who makes it - and some Always Artichoke. I stamped Golfafella with black StazOn on watercolor paper and colored him with my markers. This piece is layered on some Chocolate chip and Always Artichoke. The sentiment is from the Bursting With Joy (retired) stamp set. Oh yeah and there is some Chocolate Chip narrow grosgrain on here as well!


Happy Stamping!


Gigi